Building or renovating a home can come with its share of challenges, like dealing with unsightly brickwork. If you’re looking for an easy way to improve the look of your home without taking on too much work, fixing up ugly brick is a great place to start.
In this post, we’ll discuss some simple methods for improving the appearance of your bricks so that they enhance the beauty of your house instead of detracting from it.
We’ll cover how to fix ugly brick on house and how to patch cracks and chips in the mortar and update discolored bricks – whether by painting them or using alternative approaches that don’t involve paint – so that you can restore the visual appeal of any eye-catching features incorporated into your design. Read on to learn more!
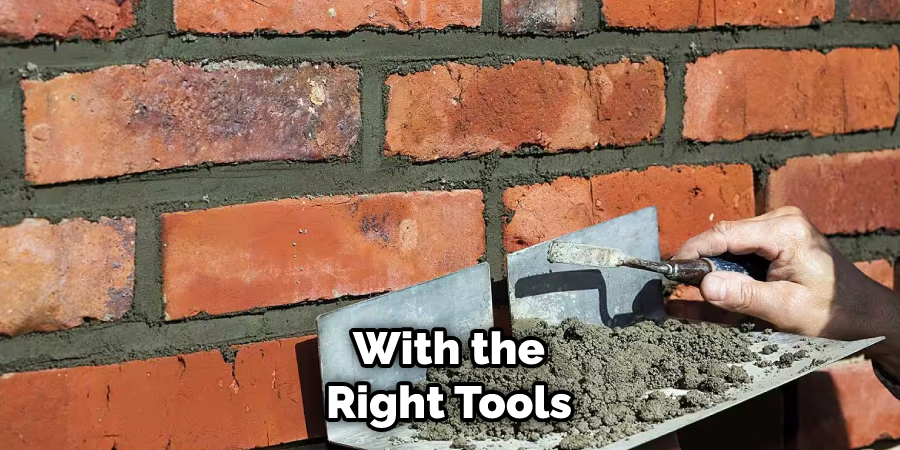
Necessary Materials
Given below are the materials that you should gather in order to fix ugly brick in the house:
- Wire Brush
- Masonry Cleaner
- Mortar
- Trowel or Pointing Gun
- Paint (if desired)
- Brick Sealant or Protector (optional)
11 Easy Steps on How to Fix Ugly Brick on House
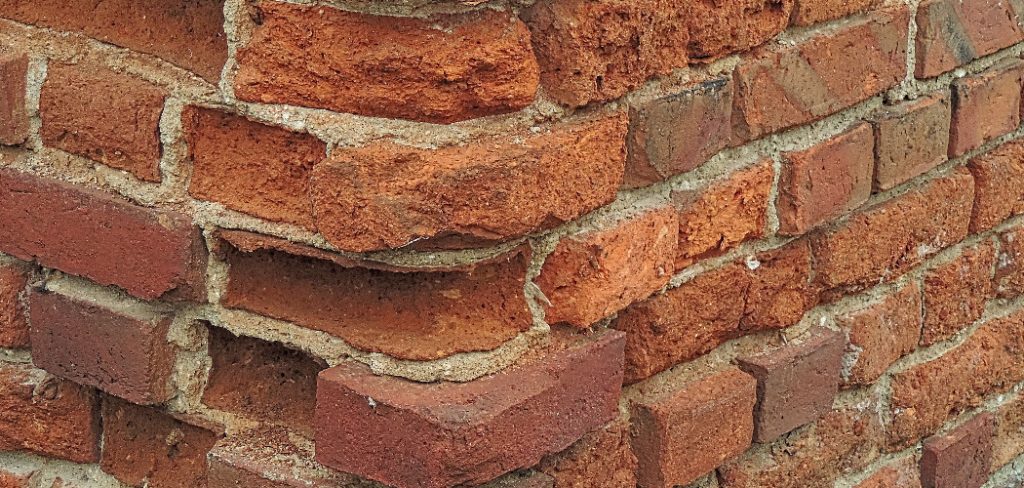
Step 1: Inspect the Brick
Begin by examining the brick to identify any damaged, crumbling, or missing pieces that need to be replaced or patched. If the brick is severely damaged, you may need to remove and replace it.
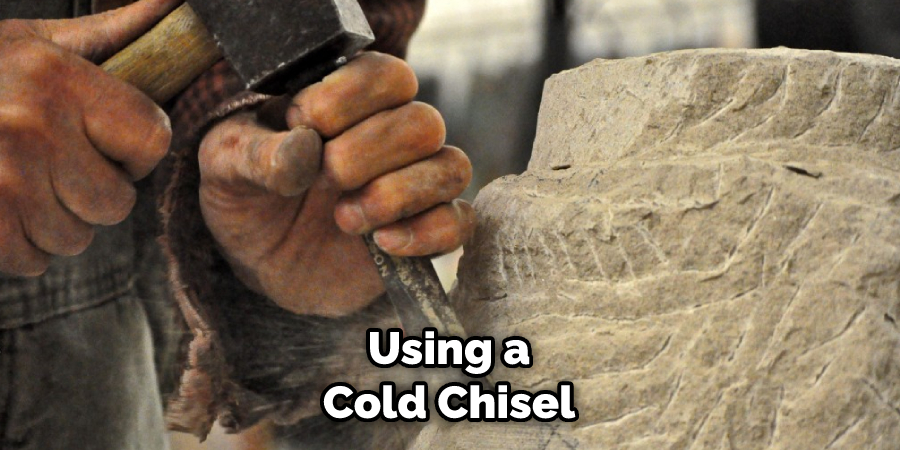
You can do this by using a cold chisel and a hammer to gently chip away mortar around the brick, then lift it out. This is a labor-intensive process, so if the brick isn’t too badly damaged you may prefer to simply patch it.
Step 2: Inspect the Mortar Joints
Take a look at the mortar joints between the bricks to see if there are any cracks or holes that need to be filled in. If you spot any, use a wire brush to clear away any loose debris and make sure the surface is smooth.
It’s important to make sure the joint is completely dry before you continue, so use a hair dryer or fan to speed up this process. If there are any large cracks or gaps, use a pointing gun to fill them in.
Step 3: Clean the Bricks
Use a masonry cleaner to clean off dirt and grime that may have built up on the bricks. You can also use a pressure washer if you have one available. It’s best to use a detergent specifically designed for masonry, as this will help prevent any discoloration or fading in the long run.
But make sure you don’t use a cleaner that contains acid, as this could damage the bricks.
Step 4: Patch the Cracks
Mix together some mortar according to the manufacturer’s instructions and apply it to any cracks or holes using a trowel or pointing gun. Make sure you press down firmly so that it will stick properly.
Allow it to dry according to the product directions before moving on to the next step. Remember to wear safety glasses and gloves for protection. If possible, try to match the color of the mortar as closely as you can in order to maintain an even look.
Step 5: Paint Discolored Bricks
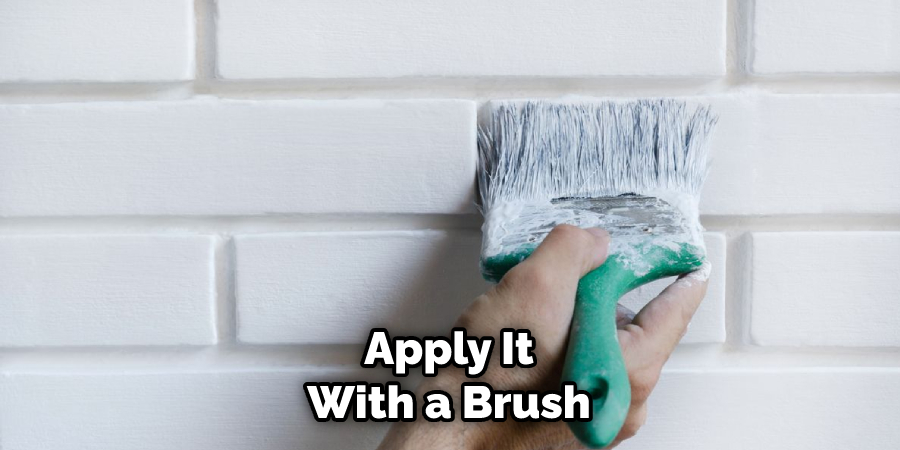
If you have any discolored bricks that are detracting from the look of your house, you can paint them if desired. Choose a high-quality exterior paint in a color that matches or complements the other bricks and apply it with a brush or roller. Make sure to use even strokes for the best results. This is a great way to update the look of your house without too much effort.
Step 6: Apply Brick Sealant or Protector (optional)
If you want to keep your newly refreshed brick looking good for longer, consider applying a sealant or protector. This will help protect against dirt and grime buildup, water damage, and fading due to sunlight exposure.
If you’re not sure what product to use, consult a masonry expert for advice. This is especially helpful if you have antique or historic bricks that require a special type of protection.
Step 7: Let It Dry
Once all of your repairs and painting are finished, it’s important to let the brick dry completely so that all of the materials will be set properly. This can take 24-48 hours depending on weather conditions and other factors, so be patient!
But once the brick is fully dry, it will look as good as new. It’s worth the wait! However, it’s best to avoid using any of the areas until they are completely dry, as this can cause damage.
Step 8: Enhance the Features
If you have any eye-catching features, such as archways or other decorative elements in your brickwork, enhancing these with a few coats of paint can help draw attention to them and give the overall look a boost.
Be sure to use paint that is suitable for masonry, and take the time to get it right. The results can be stunning! It’s a great way to give your house that extra bit of charm. The possibilities are almost endless – just let your imagination run wild!
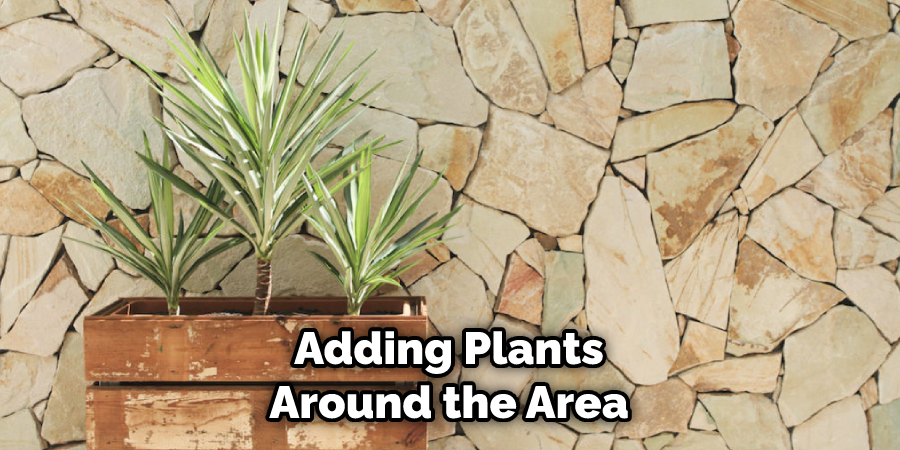
Step 9: Add Greenery
Adding plants around the area can also help make ugly brick more attractive by providing contrast and brightening up the space. Consider adding some shrubs or flowers in planters near the bricks for an extra pop of color. This is a great way to make your house look more inviting and cheerful.
Take the time to experiment with different ideas and find something that works best for you. With a few simple steps, you can easily transform ugly brick into a beautiful feature of your home.
Step 10: Clean Up Debris
After all of your hard work is done, it’s important to properly clean up all debris from your project so that there are no safety hazards left behind. Once everything is cleared away, give it a bit of time to set before admiring the finished product.
After all your efforts, you’ll have a house with beautiful, refreshed brick that adds character and charm to your home. All it takes is a little bit of patience and a few easy techniques to make ugly brick something you can be proud of!
Step 11: Enjoy Your Work!
Once your ugly brick is looking good again, sit back and enjoy the results of all your hard work. You’ve successfully revitalized an eyesore and restored the visual appeal of any eye-catching features incorporated into your design. Always remember that brick is a great material to use in home improvement projects – just take the time to do it right!
These are some basic steps that can help you on how to fix ugly brick on house easily and quickly. With just a little bit of effort, you can save yourself money and maintain a beautiful home exterior for years to come. Good luck!
Do You Need to Hire Professionals?
Although it’s possible to fix ugly bricks in-house by yourself, it is best to seek professional help if you don’t feel confident enough in your abilities. A professional can provide advice and guidance on the best approach for fixing the bricks, as well as offer valuable insight into ways to enhance their look and make them more attractive.
They will also be able to identify and address any underlying issues that could cause further damage if left unchecked. Ultimately, hiring a professional can save you time and effort in the long run.
How Much It Can Cost?
The cost of hiring professionals to fix ugly brick on a house can vary depending on the size of the project and the amount of work required. However, you can expect to pay anywhere from $500 to $5,000 for a complete overhaul.
If you’re just looking for some basic repairs, such as filling in cracks or painting over discolored bricks, you may be able to get away with spending as little as $200. Make sure to ask for a detailed quote before deciding whether or not to go ahead with the project.
Frequently Asked Questions
Q: Is It Difficult to Replace Bricks?
A: Replacing bricks is a labor-intensive process, so it can take some time and effort. However, if you’re prepared with the right tools and materials, it can be done relatively easily.
Q: Can I Paint Over Ugly Brick?
A: Yes, you can paint over ugly brick as long as you choose a high-quality outdoor paint that matches or complements the other bricks in your house. Be sure to apply even strokes for the best results.
Q: How Often Should I Reseal or Protect My Brickwork?
A: If you want to keep your brick looking good for longer, consider applying a sealant or protector every few years. This will help protect against dirt and grime buildup, water damage, and fading due to sunlight exposure.
Q: How Long Does It Take for Brick to Dry After Repairs?
A: Depending on weather conditions and other factors, it can take anywhere from 24-48 hours for the brick to dry after repairs. Be sure to give it time to set before admiring the finished product.
Conclusion
Now that you know how to fix ugly brick on house, the sky is truly the limit when it comes to your own DIY projects. If a brick wall doesn’t fit with the aesthetic of your home, then you can now make sure it does!
Some projects may be more complex than others, but with a little thought put into it and some elbow grease, any project involving bricks can be made manageable and ultimately worth the effort.
So if you want to improve the look of your home and give it new life, why not start by tackling that pesky brick? With a bit of work and creativity, you’ll be amazed by what kind of results you’ll achieve. Happy renovating!